Rendering is the process of generating your final detailed images, based on your current camera, 3D geometries, materials and lighting setup. When watching a 3D animated feature film, series, or advertisement, you’re looking at the final rendered sequence.
The traditional method of rendering is heavily CPU or GPU dependent. During rendering, your workstation would be completely occupied and working on other tasks is close to impossible. Large studios have dedicated computers (a.k.a. Render Farms) setup specifically for this task. What makes Clara.io unique is its cloud based rendering pipeline that allows users to render images without using their local machine’s hardware.
Once the rendering has been executed, all the work happens on our servers. This means you can continue working on other tasks without losing performance.
####Full V-Ray Setup
The Full V-Ray Setup command applies all the main setup requirements automatically. This includes a V-Ray Renderer, camera, and a 3 point lighting setup for your scene. This can be achieved by going to Render > Render Presets > Full V-Ray Setup.
###Manual Render Setup
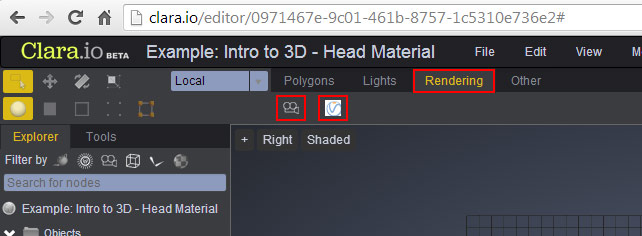
Before we can begin rendering, we need to go through the process of setting up V-Ray. Switch over to the Rendering tab, and create a camera by clicking on the Camera icon. Next click on the the V-Ray icon to apply it to your scene.

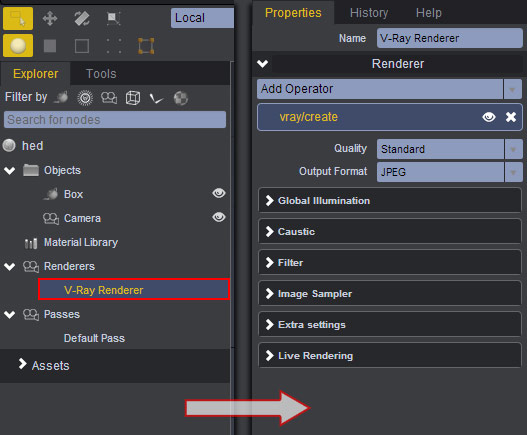
After applying V-Ray, you can begin adjusting your render settings. By selecting V-Ray from your Explorer, you can access the render settings from properties panel.

####Render Region
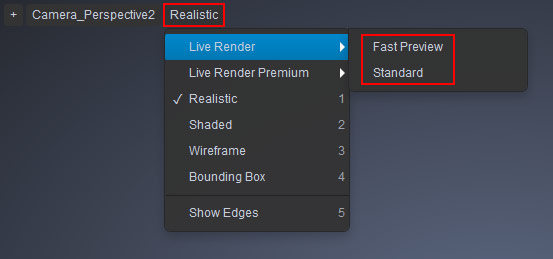
To see a preview of your final render, hover your mouse to the upper left corner of your camera viewport, click on the Shader drop down menu, then Live Render > Fast Preview or Standard. Your render preview will now take effect and render according to the selected quality.

####Passes
Clara.io gives you the ability to create new passes with new render settings and different cameras. From the Explorer, right click on Passes and select Create Pass.
To access the settings of your current pass, select the Passes icon in your Explorer. Now the Global settings will appear on the right of the UI. From here, you can adjust the final render’s resolution, the Current Pass, and time line frame settings.
To access the settings of your newly created pass, make sure it is selected in the Explorer. From there, you can choose your renderer (in our case V-Ray) and the camera you’d like to use.
####Render Current Pass
When you’re happy with the final results and would like to render a final image, go to Render > Render Current Pass. This will execute the final render and save it to your hard drive based on the settings applied.
####Quality & Output Format
With V-Ray selected in the Explorer, you now have access to render settings from properties panel.
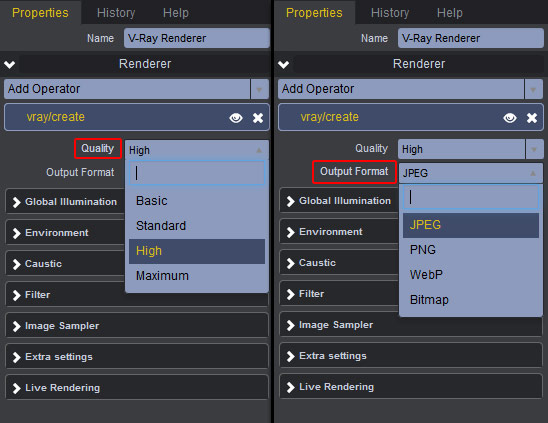
The Quality menu gives you a list of 5 different settings. While the names are pretty much self explanatory, keep in mind that the higher you go in quality, the longer it takes to complete your render.
The Output Format menu lets you choose from four different image formats:

You can learn more about the V-Ray Render settings from Chaos Group’s official user guide.