Uploading
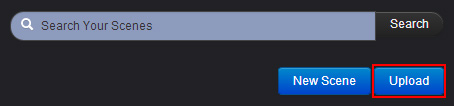
- You can either visit the upload page directly: clara.io/upload, or in the Scene List, you will find the Upload function located to the right of your screen, underneath the Search Box. Click on Upload to begin.
- Clicking on Upload prompts you with the Upload page. From here you can choose the file you wish to upload.
Click Choose Files to browse through your File Directory on your local Hard Drive.
You can choose more than one file by holding down Ctrl, or by selecting Choose Files again after completing your first selection.
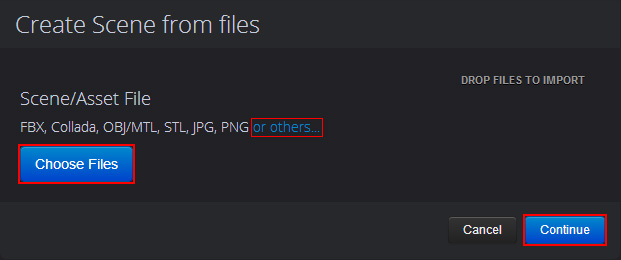
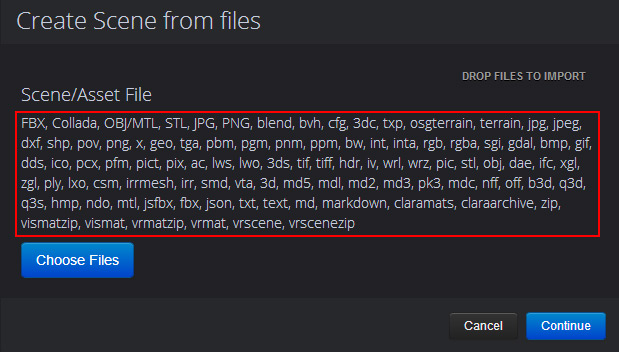
Note: Clicking on or others… displays an extended list of acceptable file formats.
- Click Continue to proceed. Here you will be prompted with the Scene Information. You can create a Name for your scene and choose the type of Access Control you wish to use.
You can learn more about Access Control by referring to the Permissions page here.
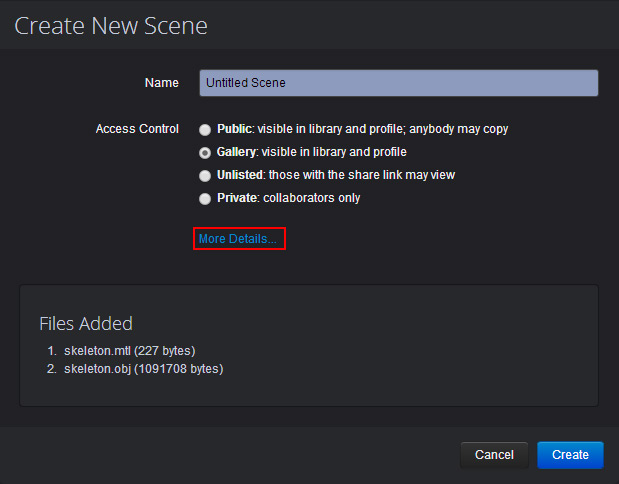
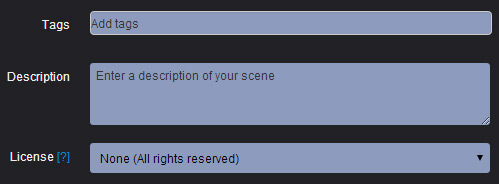
Note: Clicking on More Details… allows you to enter Tags, Description of your scene, and the License type. You can learn more about the different License types by visiting Creative Commons.
Click on Create, to begin uploading. When finished, you will be prompted with a small interactive window that can be viewed in three different modes:
Image - Displays your uploaded objects in a still image.
- Real Time - Displays your 3D models in an interactive WebGL format.
- Photo Realistic - Displays your 3D models in an interactive live rendering preview format.
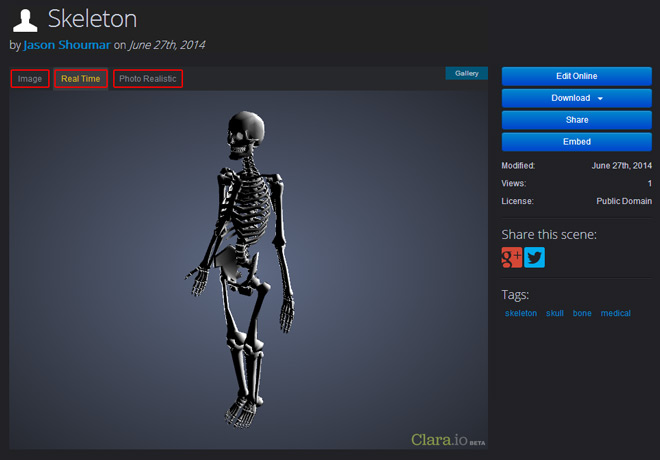
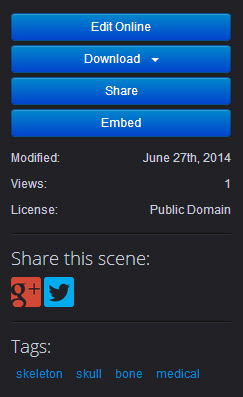
To the right of the interactive window are four functions:
- Edit Online - Takes you to the Clara.io Scene Editor.
- Download Allows you to download the model in five different formats: FBX, OBJ, STL, Collada, and ThreeJS.
- Share - Allows you to share your scene with other collaborators. You can learn more about Sharing here.
- Embed - Prompts you with settings for embedding your scene on other sites. You can learn more about embedding here.
Below the four functions, are the Scene Status, Social Network sharing, and the keyword Tags you chose to relate to your model.
The Scene status consists of Date Modified, Number of Views, and License Type.
While the Tags section displays the keywords you chose in the previous window.
Note: If your Access Control settings were set to Private, then the Social Network sharing will not be visible.